Walking Meditation
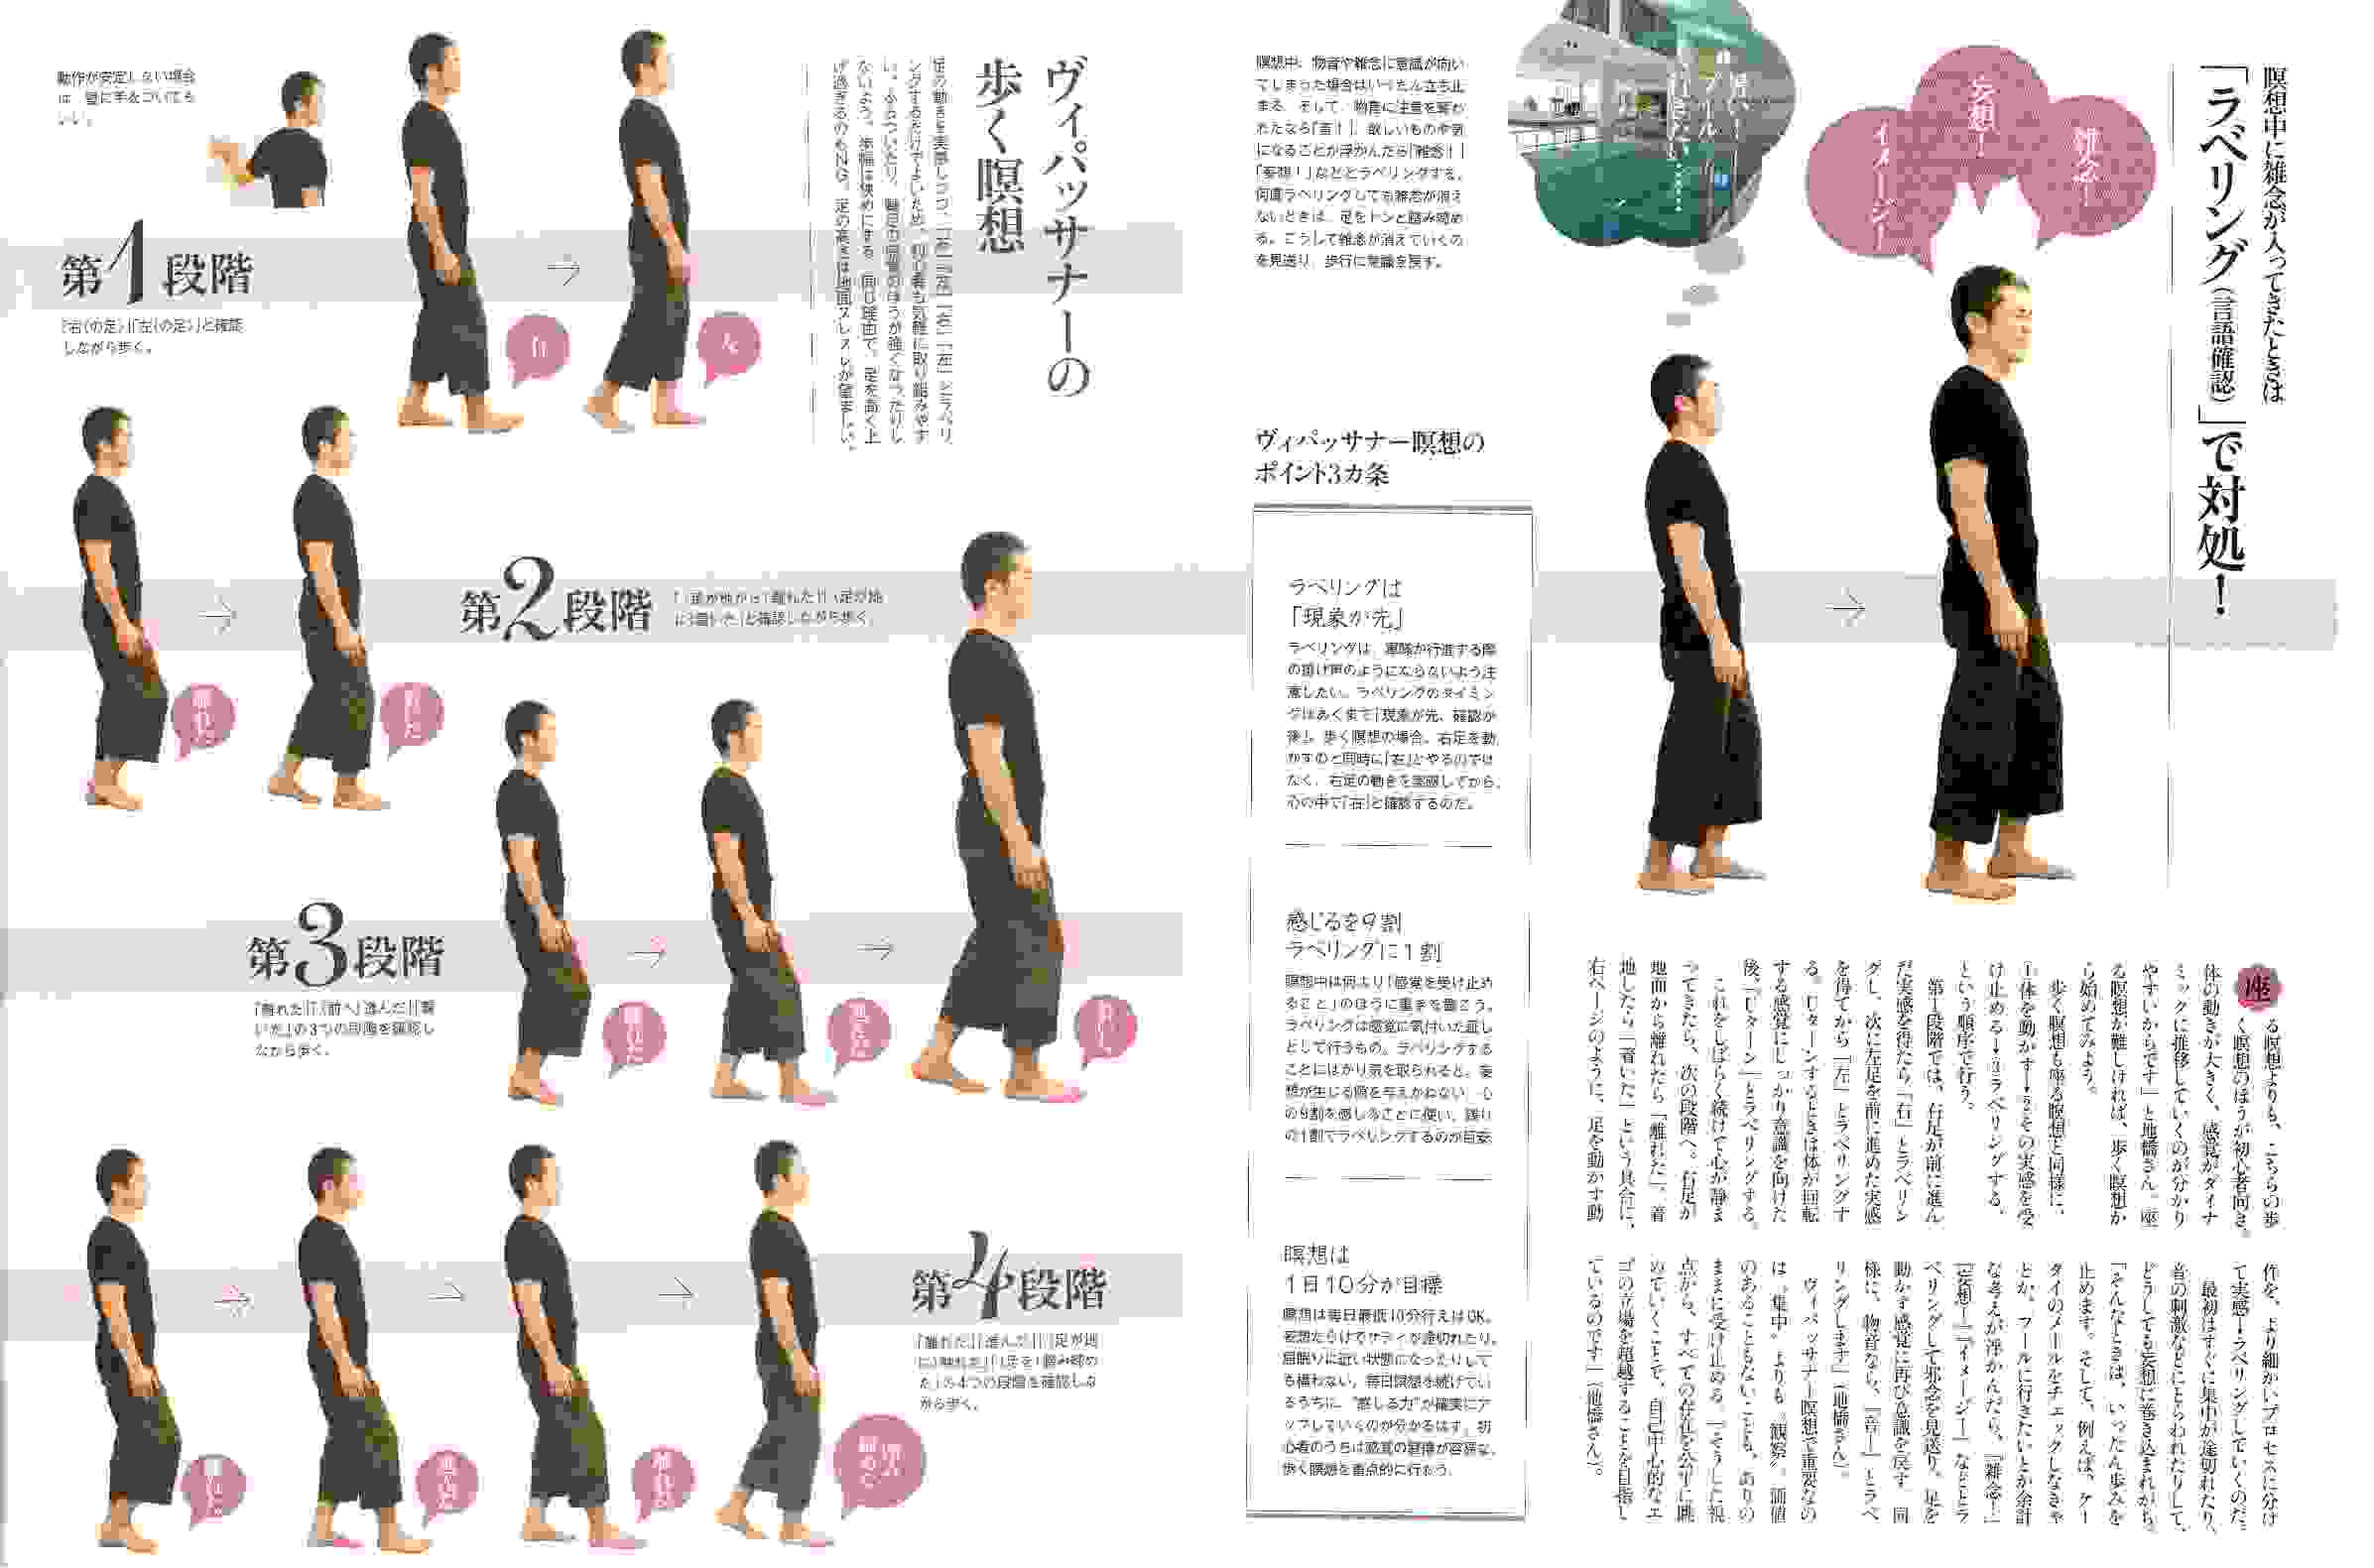
The Buddha talked about the importance of mindfulness even when we walk. The practice of walking Buddhist meditation thus came to be. It is sometimes difficult to stop and take the time to sit down and meditate. Meditating while walking is also greatly beneficial. Here we have a how-to I took from a Buddhist magazine in Japan. It is inspired by the Vipassana walking meditation.
STEP 1
The walking meditation practice consists of many steps or levels of proficiency. The total beginner will concentrate on which food is in front. For example, you will put the right foot first and you will mentally say “right”; move the left one and say “left”. Keep on doing this for at least 10 to 15 minutes.
Your steps should be short as not to lose balance and not to go too fast. This is not a military walk. If you have balance problems at first, run your hand along a wall as in the very first picture.
Do not look around you as you will get distracted and your mind will wander. Do not look at your feet for the same reason. Instead, you should aim to look four to five steps ahead of you; just enough to know the immediate terrain you will walk on.
STEP 2
![]()
After a few days practicing for 10 to 15 minutes, you will become better at concentrating your mind on which foot is in front. It is now time to add more things to be aware of.
If you look in Step 2 in the picture above, (the one with the numeral 2) you will notice 2 steps. It is simply to be aware of the movement of the foot. At this step will will only care for 2 movements: lifting and placing.
So, your mental chatter will sound like: "right, lift, place; Left, lift, place" and so on.
Note: you will naturally slow down to have the time to decompose your step.
STEP 3
Now that you feel confident in Step 2, we will add a single component to your step: moving.
At this point, you can, if you wish so drop the left-right mental note but is not bad to continue using it. For convenience, I will drop it here.
Again, look at step 3 in the picture for a visual reference. Your mental message will be:" lift, move, place, lift, move, place." Be careful not to go too fast here, especially if you dropped the left-right.
STEP 4
Let’s add one more thing. In addition to lift, move, place, we will insert "heel up" at the beginning of the sequence. It will then look like this: "heel up, lift, move, place. heel up, lift, move, place." Take a short pause between each movement, just long enough to say what you are doing.
STEP 5
In the magazine, they stop here but the traditional Vipassana walking meditation adds 2 more steps: here is what the final 6 movement sequence looks like: "Heel up, lift, move, lower, touch, place.)
When you lower your foot after moving it and just before touching the ground, say lower. When the ball of your foot (and not the heel, this is a bad walking practice as it sends shock waves through your spine and is unnecessarily noisy) touches the ground, say touch. Finally, when the rest of your foot is on the ground and you transfer your weight on it, say place.
This 6 step movement is slow and it is necessary to lift your foot more than you would normally do in order to both keep your balance and have enough space to deconstruct your step. If you watch this video demonstrating the final process, you will see that I do 3 steps in 30 seconds. You should aim for such a pace, unless you are in a public area where walking this slow would look really strange.
Ultimately, you should aim for less than 100 steps in 10 minutes (at the rate showed in the video, it would be 60 steps). Do not forget to breath. Your breath should be slow and steady, do not hold it.
At the beginning, start with 10 minutes long session but you can walk up to 1 hour in that fashion. During the Vipassana retreats, people spend 6 hours doing walking meditation.
|
Return from walking meditation to Buddhist Practice |


New! Comments
Have your say about what you just read! Leave me a comment in the box below.